Sunday, 12 April 2015

Nail 101 - Cuticle Remover Under 5 Mins

Cuticle remover Under 5mins!

Ever tried soaking your fingers in warm water for about 15mins, softening the cuticles, if not soften yet longer soaking time? Time wasted especially if your doing it by yourself?

Well I did.

And I found the best way to reduce the time and yet get better results UNDER 5MINS!

A foul prove method that all beginner nail fanatic will transform into a professional.

Introducing.....
Three Beauties of London's Cuticle Remover.


Directions (from box) :
Apply to cuticles and leave on for 2-3mins. Gently push back cuticles with cuticles stick and thereafter thoroughly rinse with warm soapy water.

I tried exactly the same and well gotta tweak the directions a little bit.

Here's how I did it...
 Apply 1coat of Cuticle remover along cuticles

 Once the liquid dries up, take your cuticle stick and gently push back 
your cuticles. You will start to see little bits of cuticles(dust like)
forming as you push.

I rinse under tap water. Guess Singapore so hot no need 
for warm water. Oh do rub your cuticles a litle to ensure all cuticles 
are rinse off.

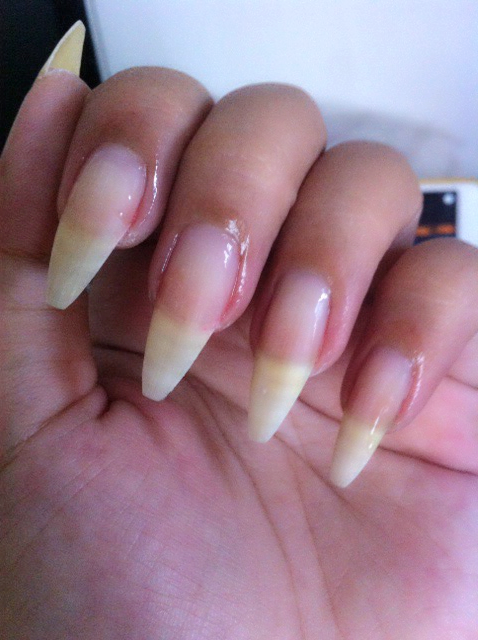
Here it is after only rinsing with tap water. Some cuticles are stubborn and still on nail bed.
I used Cuticle cutter to trim it off. And trust me, you dont need to soak or whatever,
cuticles are so obvious and soft to trim off.

Protect and moisturise your nails ALWAYS.
I use Three Beauties Intensive Cuticle Renewal Oil

Apply 1 coat of Cuticle Oil, leave for 2mins and rub it into cuticles gently and
wipe off with paper towel.

Voila! From here on you could paint aand design your nails as per normal.

Try it and you will Love this product as much as I do.

Let Clean Nails be your Bestfriend

 Faith.Love Feline


Sunday, 29 March 2015

Nail Tutorial - Naked Rebel

Naked Rebel


I Love how naked my nails look. But as a female, full of vanity, I would still beautify and enhance with a touch of  camouflage.

Today, my nail art is simple and classy, naked and camouflaged.

Here's how:

Tools: Three Beauties natural nail Camouflage & Nail Art.

Love the Nail Camouflage, it's a nail concealer. Super easy to apply on.
I applied 3 layers to get a light shade of nude.


Here below are the ways I apply using the nail art.
Randomly apply 1 layer of each nail art colour onto nail, using basic shapes.
Using Black nail art polish, paint on lines / curves / dots.
This week my black outlines do not outline the random shape, 
instead I go against it.

Creating a REBEL of lines.


TIPS: 
To create thick lines - Hold your nail polish in a 45degrees angle
                                  - Press onto nails and glide
To create thin lines - Hold your nail polish upright, 90degrees angle
                               - Using the tip of brush, gently glide across your nailbed.

Remember, there is no right or wrong in ART. Keep exploring and have fun.

Let naked nails be your best friend.

Faith.Love Feline

Sunday, 22 March 2015

Sweet Pink with a Twist

Sweet Pink with A Twist 


Recently I got my hands on new nail purchases. Was In Mustafa Centre and chance upon the brand Three Beauties of London. They have a line of awesome colours nail polishes and nail care. Bought quite a few products and started cracking on them.

Let me introduce a few:


Nail Rebuilding Protein.
Aims for healthier, stronger nails.
Contains Horsetail which is a healing herb, rich in nutrients and high in silica
which  promotes strong healthy nails.
Promises to have noticeably stronger nails within weeks.
I'm using this as my Base Coat.

Nail Art.
Precision Brush. Brilliant Finish.

Let's start nail painting....

Today I be using


I'm using nail art Black. As you can see the 
brush is thin, ideal for painting designs.

Here's how:

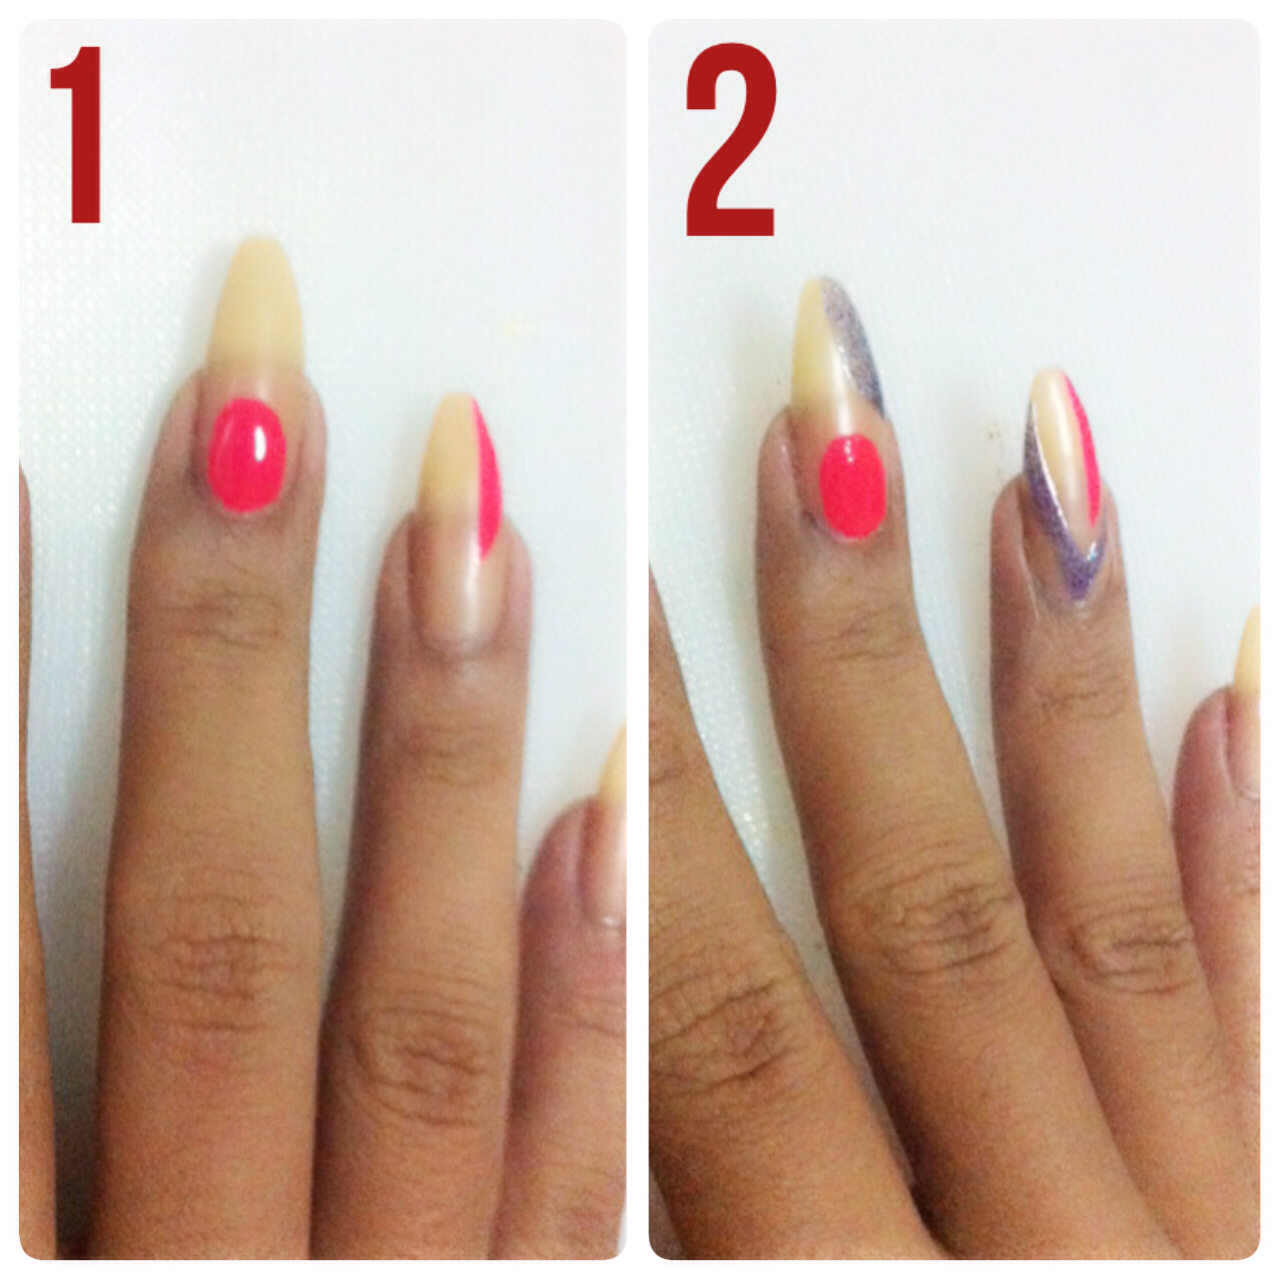
I started with painting my index and last finger nail using Three beauties of London,
Sandy Salmon. Thumb nail with China glaze, Sugar High. 
Ring finger with Sugar High, here i just swipe a small curve
on the side. Middle finger with Sugar high at the tip of nail &
a light touch of Three Beauties of London, Glitzy Slam.

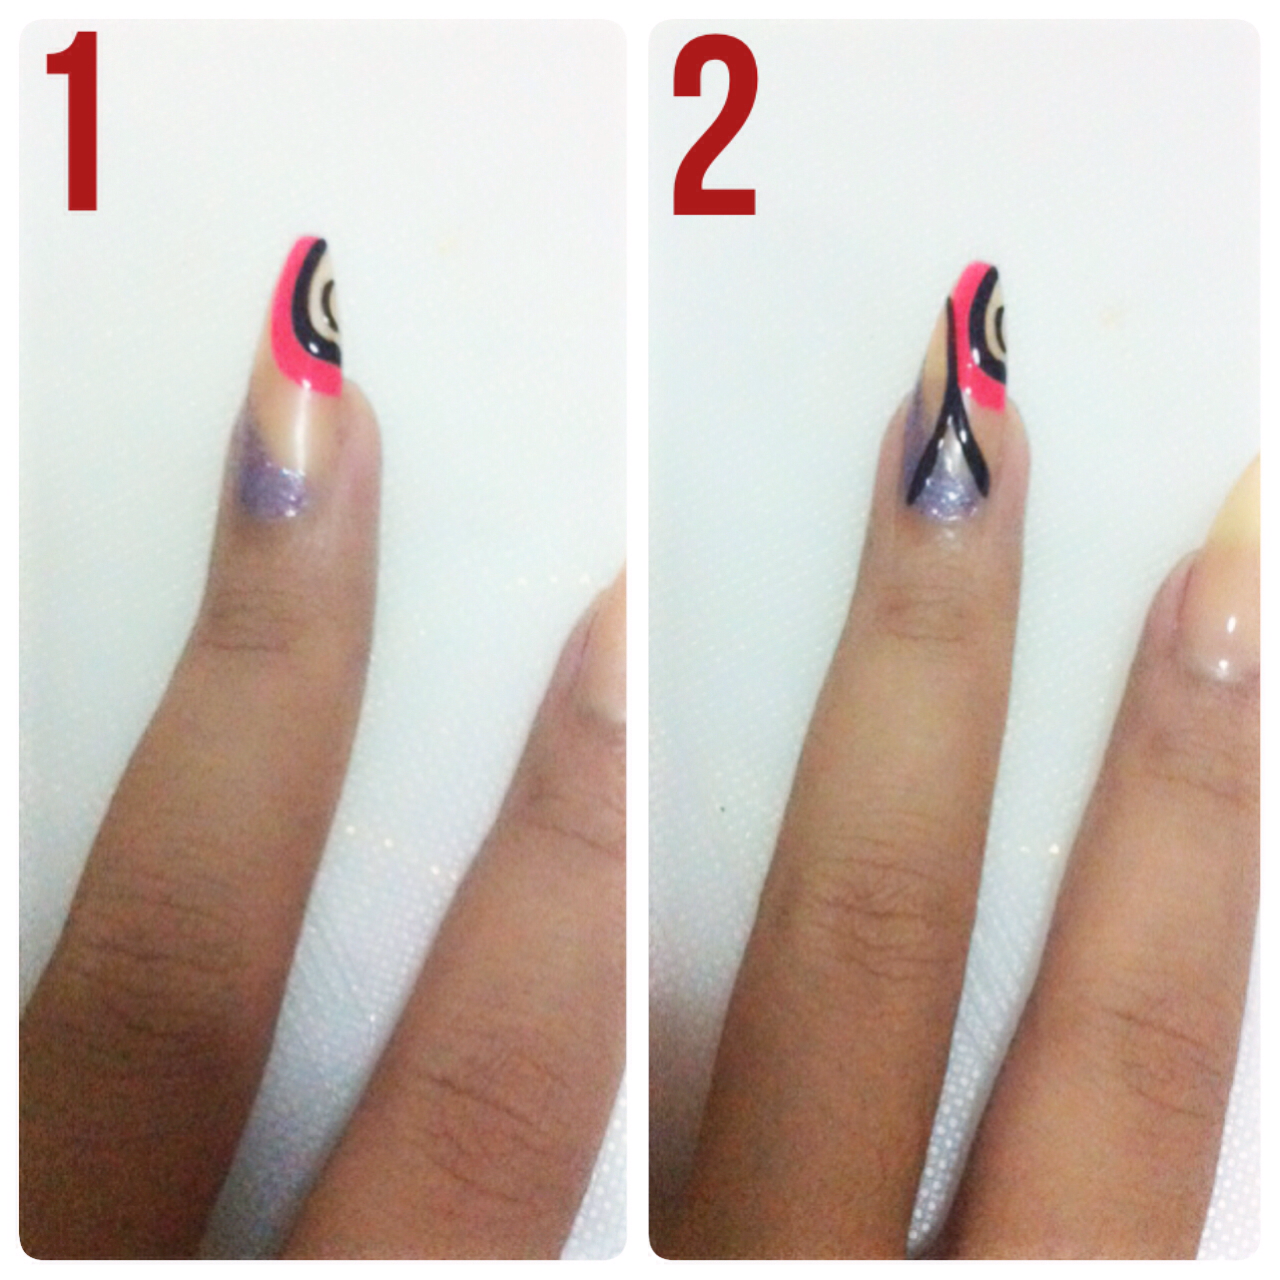
Here is how I design the ring finger.  

Here is the design for middle finger.

The trick to be able to design are 4 rules I go by:
  1.  Outline the colour part First.
  2. Add in the rest of design in negative spaces left.
  3. 3 types of design to play with Strips, Curves & Angles.
  4. Play with Thick & Thin lines.

Have fun exploring. If afraid, start exploring on paper and pen first, once confident convert your design on paper to nail.

Remember there is no right or wrong in creativity.

Let Sweet Pink be your bestfriend.
Faith.Love Feline


Sunday, 15 March 2015

Nail Tutorial - Cris Cross Snake


Criss Cross Snake


It's has been a looooong while since I post up a blog. My nails have grown tremendously
long and stronger then ever. Well before it breaks Im gonna start posting up a
few Nails Tutorials.

I have been trying to find a good tape that sticks onto nails yet doesn't peels off the base color.
Bought myself some tape, manufactured for the use of creating double-eyelids, and loving
the texture. Perfect!


You can get this tape from beauty stores like Watsons or Guardian or Sasa,
could even find it in Bugis Village.


So Let's start Cracking Lacking...

These are the nail polishes I'm using today. You can play it up with other color
of your choice. I'm using Three Beauties Neon Green as once the tape is off
I want a striking luminious color seeping out.

First of all, after cleaning n shaping your nails, add a coat of your
favourite Base Coat and 2 layers of Three Beauties Neon Green.

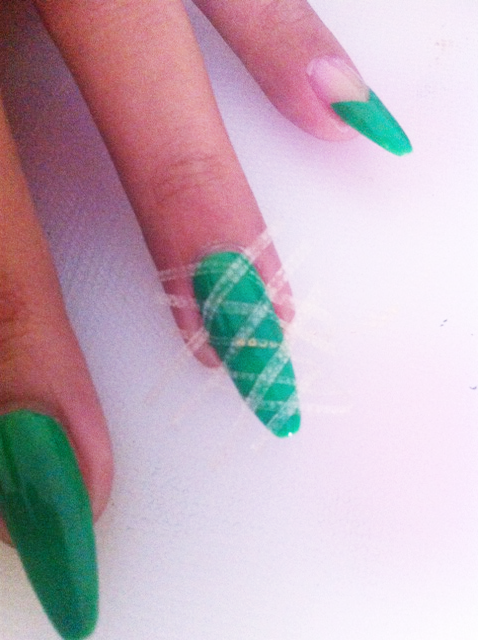
I have cut out an inch of tape, further cut it into thin strips,
tape onto nails in a criss cross manner. DO make sure the tape
at the side of nails are secure, that is the most important place that
has to be securely taped.

Apply 2 layers of O.P.I  Angel with a Leadfoot,
making sure the edges of nails are covered with nail polish.
Now to create  a contour effect. We are using ChinaGlaze Westside
Warrior and  Make up Sponge.
Drop 2 drops of nail polish onto sponge and  dap onto side of nails. See picture below.

Now carefully  peel of the tape starting from the upper layer and work your way down
Got some nail polish on sides of nails? Don't worry just  dip your cotton bud into nail
polish remover and slowly gently rub off the nail polish.
Now apply your favourite Top  Coat  and you are done.

Voila you are done. I dazzle up the other nail with indian decals. You can find that tutorial here.

Hope you like my Tutorial.


Let Mix up nails be your bestfriend
Faith.Love Feline


Wednesday, 7 January 2015

Nail Tutorial - Aztec Nailart


The Aztecs.


Aztecs, originated as a nomadic tribe in northern Mexico, has amazing detailed architecture, headdresses, clothing, jewels all revert back to nature.

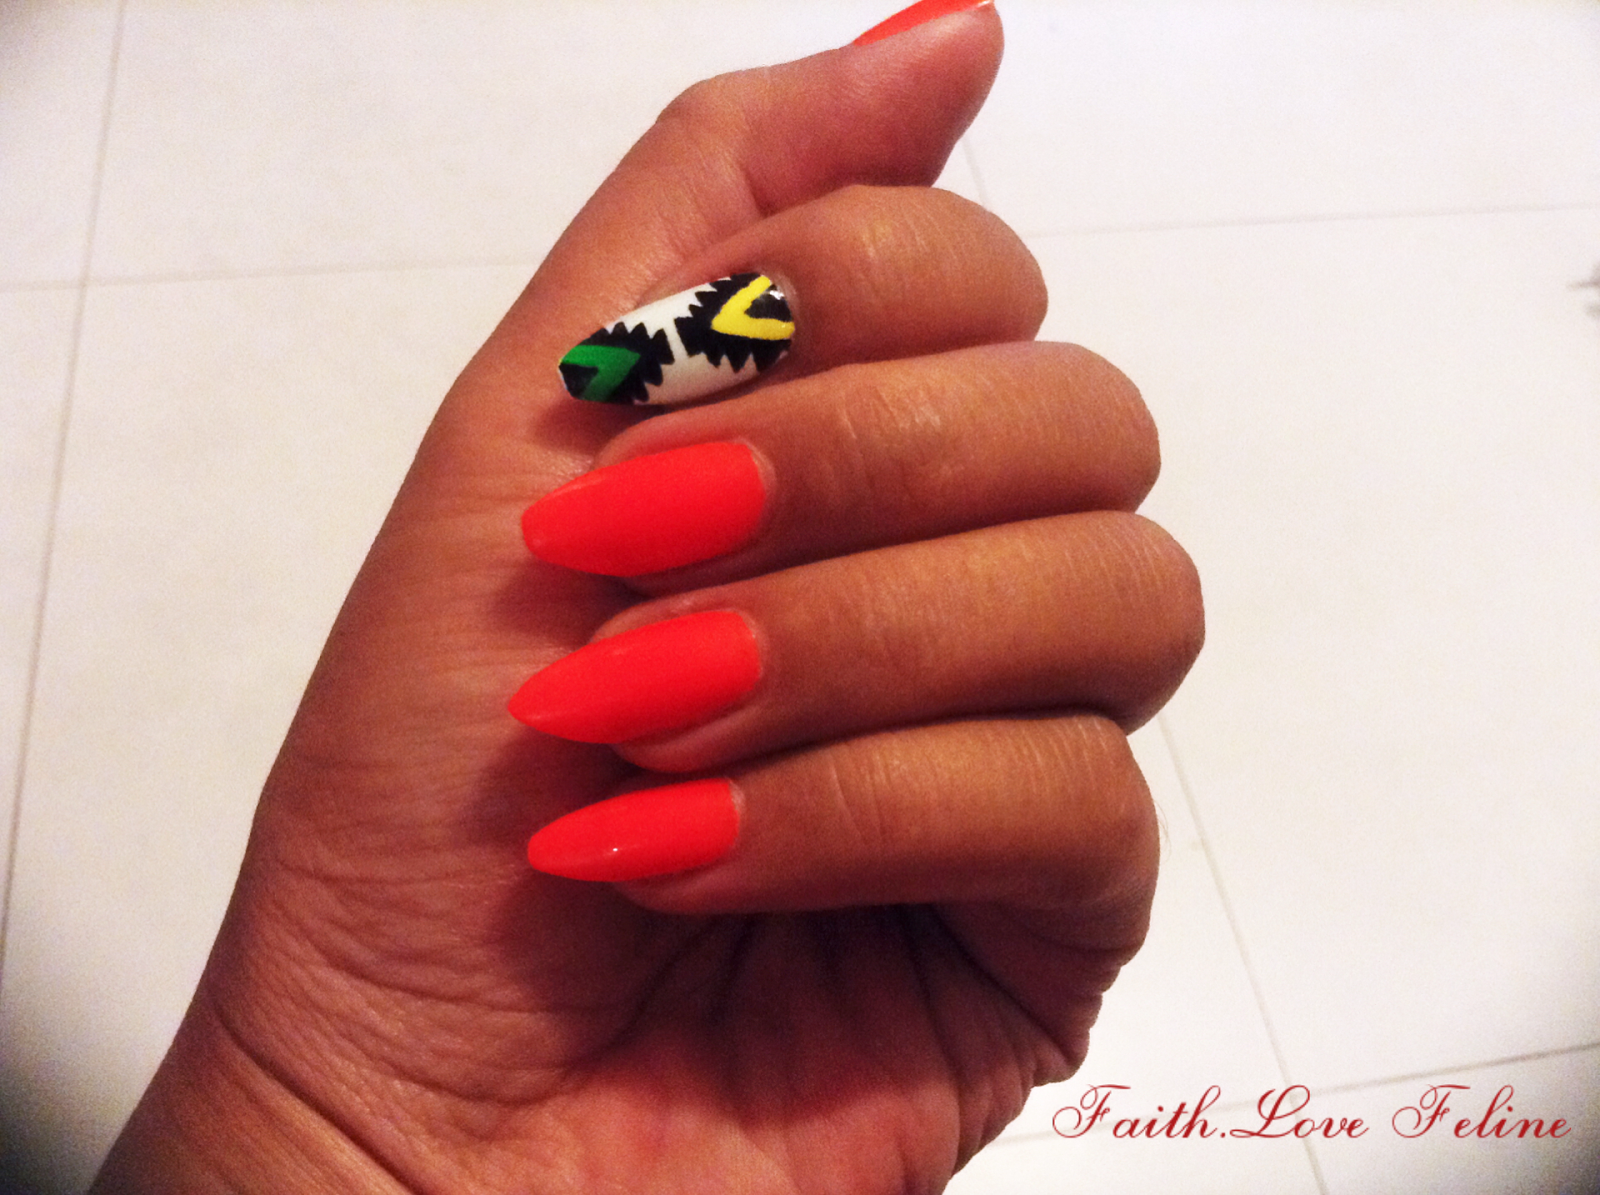
The design intrigues me so much that I attempted to try it on my nails. I must say this is the hardest nail art I have done, though I have already simplified it. Especially when painting it on my right hand. My eyes got so tired from drawing every small angles.

All i can say is, It was worth it. The outcome was amazing! And as always practice practice practice to perfect it.

Let's get cracking...


This are the essential special tools you really need to have to achieve amazing results.
A dotting tool, a thin long brush & a slanted flat brush.

Extra Tools:
White Nail Polish
Yellow , Black , Green Acrylic Paint

 Paint on 2 coats of White Nail Polish & let dry completely
1.  Using dotting tool to mark out a upper & bottom triangle.
I'm using dots as a marker to achieve a better, straight triangle & linekinda like connect the dots game.
2.  Using Yellow Paint and connect the lower dots, creating a triangle.
3. Using Green Paint and connect the upper dots, creating a triangle.
4 & 5. Now use Black Paint and paint smaller triangle inside of the previously painted triangle

6&7. Use Slanted flat brush and outline the triangles.
8-11. This is the tidies part. Painting on petite triangles on sides of triangle.
My tip is to start on the top and work your way own.
Always alternate painting the sides to ensure the petite triangles are symmetrical.
Once done, apply top coat.
Apply contrasting color on other nails to bring the design out. I'm using neon orange. You could choose any color but avoid dark colours.

VOILA done…

Hard work pays off truly…

Let Aztec nails be your best friend


Faith.Love Feline

Tuesday, 16 December 2014

Hair - To Wig Or Not To Wig

Hey fellow felines,


Have you ever wondered….
'How nice if i have longer hair?' 
'Why can't my hair grow faster?'
 'Will i look great with Bangs?' 
'Would Blonde suit me?'

I got the right solution for you, WIGS. If you have been following my blog, you would know by now I'm crazy about changing my hair color. As of now it is green but today it is…..

Voila!
Wigs are sold everywhere now. Don't get me wrong I don't mean the party kinda wigs, but Fashionable kinda wigs. It has all lengths, colours, texture and the fun is endless. You could create a different look everyday by changing your wigs. hahhaa and allow people to get confuse.


Im feeling long wavy with bangs…

No.. I want Short with Bangs..

Nah I just want a long Pony Tail...

Its endless fun. It's play dress up with yourself hhahhaa… 

We are living in a fake world now. Fake Lashes, Push up Bra, Corset all in the name of beauty. But with beauty we must know what we getting and how to take care of the Wig.

First thing you have to know is Do you want a Synthetic Hair or Human Hair…

Human Hair basically acts and move like your hair. By attaching/putting on Human hair extension or wig it's the same concept as your hair grew longer. Which means, taking care of the wig is the same as you would with your own. It can be dyed, curled, straighten and even last longer. 

Our natural hair gets its nutrients from the scalp. With Human Hair Wig, it has no root to absorb any nutrients hence you have to feed it. Kinda creepy thinking about it… My term of feeding means applying generous amount of hair oil to keep it supply, shine and healthy looking. (Click to view the types of hair oil 1, 2, 3)

Synthetic Hair is a man-made fiber. With advancement of technology, new synthetic hair are more heat resistant. You could curl or straighten your wig with very very low heat. And it holds the style longer then Human Hair wig. 

Taking care of Synthetic hair is easy. No hair oil is required. Just fill a spray bottle with 1 part leave in conditioner : 3 parts water. Spray whenever you feel necessary .

To sum it up Human Hair is more expensive. It really depends on individual, cause for me i prefer synthetic wig. Nothing about the maintenance that puts me off but simply Ghost movies…
I know I'm such a scaredy cat…..


Where to buy Wigs:
  • Bugis Village
  • Far East Plaza
  • Chinatown Complex
These are mostly where i purchase them… I'm sure there are more places…


Let Wig be your best friend


Faith.Love Feline


Monday, 1 December 2014

Nail Tutorial - Grid

Grid Nails


So... Recently I got a new job. A job that requires me to wear 'office attire'. Kinda not the usual for me. Got me new clothes, shoes n bag. Guess what i need to 'office' up my nails too! hahhahaa

Here it is my 'Office' Grid Nail Art.

Enjoy...

Im using  Faceshop BK901 and China Glaze Pelican Gray

As Usual do your own cleaning (manicure) of  nails,
base coat n 2 layers of nails polish.

Black acrylic for our nail art today. Squeeze a drop of paint onto work
station. Add a drop of water to dilute the paint slightly. This helps for
smoth application.

Use a flat brush or flat diagonal brush. and paint on diagonal lines

Here is my finish diagonal lines.

Well done on your first diagonal line. Now paint on the other direction
diagonal lines.

Got to this much? 1 more step....

Use the back of the brush, dip it into the paint and dot onto
the intersections. Add 1 layer of your faav top coat.

Voila you are done!!! Cool 'Office' Nails huh?

I Love It... Hope you do too...

Let Grid be your bestfriend


Faith.Love Feline