Tuesday 26 August 2014

Nail Tutorial - Nail Foil


Nail Foil - Application and Removal technique


Nail Foil has been the latest craze. You could easily find it anywhere nowadays especially at *scape open market. A few stores sells solely Nail Foils.

 It's a sight!

Curious me got my hands on one and decided to try it on....

Well to be honest i didnt quite like it, i still love drawing my own nail art. 
But it's up to individual, never know if you would like it till you try it!


Things you need:
  1. Nail Foil of course 
         * note : do arrange nail foils to the closest shape and size to your nail as possible, do not get 
            one that is smaller then your nail. Better to have excess, you could trim off the excess later.


Here's how:

 Preparation - Trim cuticles, file, buffer nails. The usual Manicure
 Step 1 - Start by attaching Nail Foil to the base of your nail first.
                  - Gently press down the center of the nail foil, from the base to tip of nail, pushing air out
 Step 2 - Now start presseing down the sides of the foil. Do make sure there is no air trapped and 
                    the foil is smoothly pressed down
 Step 3  - Turn your hand around. Using a cuticle trimmer and trim off the excess nail foil
 Step 4 - Turn your hand back and trim off the sides around cuticle area.
                   * note: you could use a cuticle pusher to push the foil down, ensuring it really sticks
 Step 5 - Use a buffer and gently buffer down the free edge of your nail

There you have it! 

A good nail foil could last you a good 2 weeks. 


Taking it off:
  1. Dip you nails into a bowl of warm water for 10mins. The edges should Flake up by then
  2. Gently pull it up and peel off
  3. Repeat dipping into warm water as much as you need.
  4. Do moisturize your hand after
        *note: warm water is use to dissolve the adhesive bond


Hope you love exploring.
Do let me know what are your thoughts on Nail Foils.


Let Simple Nail Art be our bestfriend


Faith.Love Feline

Beauty - Waterproof Eyeliner


Amazing Waterproof Eyeliner

I love eyeliners but what I don't love is how it smudges. It could look like I got a black eye from some fight or I'm bad at doing smokey eye. 

The humid and heat from tropical Singapore is not exactly eyeliner friendly especially if you tend to have normal to oily skin. 

And so the hunt begins for that perfect Eyeliner...

Presenting ...


Miss Hana Waterproof Eyeliner!

A product from Korea.
Soft liner in a pencil form.
Comes in Dark Black, Glitter Black, Brown, Silver...

So I got my hands on it one day n tried it out..

Here's why I'm falling in love with Miss Hana:
  1. It's pigments are very dark, just two swipes and it's dark , very dark
  2. The pencil lead is soft, doesn't hurt the inner eyes when applying
  3. The pencil is easy to grip and maneuver 
  4. I tried it on for 12 hours, and it stays the same as if I just applied
  5. Once blunt, use a normal pencil sharpener and your done.
  6. You will need makeup remover to remove the eyeliner
  7. You can go super thin line to super thick line 
  8. Different colours to help you create different looks


Where to get:

    1. D.Y.O.N International , *Scape Orchard, #02-25.
             - $10
I am truly recommending this product to all Felines lovers...

Do get it and trust me you will fall in love with Miss Hana...


Let waterproof eyeliner be our bestfriend

Faith.Love Feline


Disclaimer: This is not a sponsored post

Sunday 24 August 2014

Travel Findings - Phuket


Feline Beauty Findings in Phuket, Thailand


A week ago I had a week long holiday in amazing Phuket, Thailand. The sun, beach, mountains were always calling me back to explore it's mysterious land. This time I caught up with surf waves! Hahaha being in small island Singapore I don't get to see real big waves. Furious waves hitting shores, one after another, the waves just kept coming. I think Poseidon is just too mad that it's too hot (just my imagination). 

With the furious waves, the salt from the sea carried it's sea salt far into land and guess what?! My hair was clump and dry just like Barbie's hair! I jet set myself finding remedy for my poor hair...

Thankfully my dear friend found an incredible store that sells all beauty products in the famous Patong Beach. From massage oils to hair dyes to salon chairs. This is a whole sale shop intended for the numerous growing number of massage shops or hair salons. 


This is the store front. As you can see the store name is in Thai :( 


Good thing is, the store is just right up front of Andaman Beach Suites Hotel, Patong Beach. Find the hotel and you will find the store.


Here you will find rows and rows of massage oils. Coconut oil, rosemary oil and lots of other exotic oils. And it's cheap too. It's so much cheaper then those you would find in the streets. Some of it are buy 3 and get a special price. 


Bleaching powder and developer for Blonde!!! Oh how happy i was! Singapore sold these in Guardian before in the 1990s but somehow they stop for reasons I don't know. But it's ok cause I found it and again it's cheap! The Bleaching Powder is buy 3 for 100baht (Sgd$4), how crazy is that. The developer is 70baht (Sgd $2.80). 

Blue packet is Schwarzkopf Igora Vario Bleaching Extra a Powder White Dust-Free Bleach. It could lift up to 8 levels of blonde with anti-yellow effect.

The other packet is DCash Master Bleaching Powder Lightener Gold. 

I will be trying the product soon and will update the outcome of it.


For those who love braiding your hair... YES they have it too!

Colours galore, each for 100baht (Sgd $4). 

If you can do it yourself or find a friend to do it, better to buy it here. When u go around shops to have it done they will charge 3000 baht (Sgd $120) or more. I love braiding my hair up especially since it keeps moisturizing my hair, keeping it supple and soft.

Too many products in the shop and this is all that I can take picture of. The shop keeper was asking why am I taking pictures hahahaaa .... 


Mark Hill Miracoilicious Moroccan Argan Oil. Found this in Jungceylon Shopping Centre, Patong Beach. The only shopping centre in Patong beach, you can't missed it. Go to Boots, a Watson or Guardian lookalike store. Selling for 425baht (Sgd $17). It's rich orange gold oil softens hair almost immediately. Worth the buy!


Since we still in Patong Beach....


Yep I got myself 2 new tattoo. Did it at Celebrity Tattoo Parlour in Bangla Street, Patong Beach. Recommended by another friend of mine who was very impress with their art work and cleanliness. 

Had one on side of my hand and shoulder blade. 

The shop is decorated real well, makes you feel you are in a boutique shop. 2 storey shop adorn with white tiles, mirrors and silver tiles on their steps. The Australian Owner just knows how to make their clients feel comfortable and at ease while getting your design quick. Pricing is weird, it starts off at 3000 baht (Sgd $120). The owner said even if it's a dot it's 3000baht. But lucky for me I wanted to do 2 tattoo and total was 3500baht (Sgd $140), a very good deal don't you think?

The tattoo artist I got was Native Thai who has been tattooing for 8months and he finished both in less then an hour. Amazing if you ask me.

Overall I love my tattoo thanks to Celebrity Tattoo Parlour.

Just to share how I take care of my tattoo:
  • No suntanning
  • Apply Vaseline every after shower or when your feel your skin is dry
  • Do not scratch


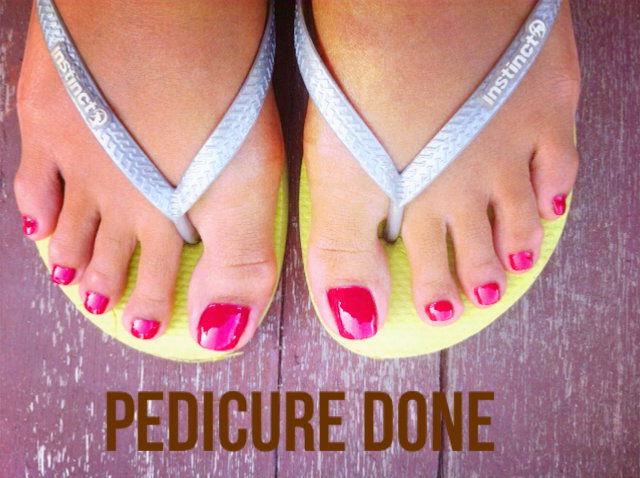
This is my favourite nail shop in Phuket. 

Nice Nail & Relax Massage, Kamala Beach.

By far this is the best nail shop I have been to in Phuket. The Thai owner and her assistant is so professional in doing manicure and pedicure. Best of all they have OPI products. Not a lot of nail shops in Phuket uses OPI, most would use cheap nail polish that does not stay on your nails after a swim in the beach.

A simple manicure/pedicure with colour cost 250baht (Sgd $10). They offer acrylic nail extension, nail art, gelish nails services. All at affordable prices. 

How to find this shop?
Most tourist would stay in Patong Beach. 
Take a tuktuk (Thailand taxi) to Kamala Beach for 400 baht (Sgd $16).
Kamala beach is very small, has only one walking street that sells clothes, restaurants and massage shops.


The shop is in a small lane off the main shopping street. It is opposite Scuba Dive Shop (there is only one dive shop).

Have your manicure and pedicure done and head to the beach. Kamala has lesser tourist then Patong. This is best for those who love peace and quiet while suntanning.


These are just some of my recommendation of Phuket.

Will be there again soon to explore and share my beauty findings.

Let beauty findings be your bestfriend.

Faith.Love Feline


Nails 101 - Nail extension

Fake Nails Experiment

Hello Felines! 

I'm crazy over my natural long nails but it broke! Well thankfully there is such a thing as fake nails. I have never attached fake nails before so it's my first time experimenting. 

I have to say I'm Lovin It!!! 


Let's Get It On!

Here's what you need: 
  1. 10 sets of fake nails ( I'm using half nails, meaning it attaches only half of my entire nails )
  2. Nail glue ( got this from Far East Plaza, the pretty salesgirl says its the best glue in their store )
  3. Nail Clipper
  4. Nail Filer
  5. Nail Buffer
Here's how...

* note - finish the entire process on one hand before attempting the other side, AND this
             time start attaching fake nails onto your right hand (if your right handed).
             Why?  Cause you will be handicap for awhile with the instant growth of fake 
             nails, haha...
           - start from pinkie nail and work your way to your thumb
           - make sure your pre arrange your fake nails for easy application ( just like I did in 
             my pic)

 Preparation - Thoroughly clean your nails, using nail polish remover to remove 
                                  unwanted oil/grease, wash with hand soap after.
 Step 1 - Measure the attached area of the fake nail onto your nail and apply nail 
                        glue to that area
 Step 2 - Apply nail glue to your own nail
 Step 3 - To attach fake nails you have to SLIDE the fake nails onto your real nails
                      - SLIDE  and apply PRESSURE at the same time (by sliding you will not 
                        encourage air/bubbles between the nails, if there are air between remove 
                        and slide again)
                     - Once fake nail is on, keep applying pressure for a minute or two (this 
                        ensures fake nail to stick)
 Step 4 - Check that you have completely glue the fake nails onto your entire nails, 
                        if not now is the best time to remove and try again 
 Step 5 - Cut your new nails to whatever length or shape you want (I'm doing 
                        stiletto nail shape)
 Step 6 - File the top of your nail (because I use half fake nails, I had to file the 
                        connecting part and smoothen the fake nail so it will look 'real' , we don't 
                        want others to know its fake don't we?)
                     - Now you file the edges of your nails, smoothing the edges and refining 
                        the shape
 Step 7 - Using Nail Buffer and buffer nail edges and the entire nail bed
Step 8 - Apply Vaseline n you are good to go! Oh now you can do the other hand


Voilà instant long nails!

Check my previous blog, Basic Home Manicure,  to find out where to buy the tools

Try it and your will love cause I sure do love mine             

Let Long Claws be our Bestfriend

Faith.Love Feline 

Hair - Why does my coloured hair fades so fast


Why does my Coloured hair fades off so fast?


Sounds familiar?

Almost all of us experience this sometime in our life. Right after walking out of the salon, we are so pumped with our new look, give it a week and it starts to fade. And sometimes it fades so fast and dull leaving us regretting spending all that cash.

Fret no more! Today i will reveal the secret to prolong the life of our amazing coloured hair!

Presenting:
Non-Sulphate Shampoo...

Over recent years, commercial hair products have started to introduce Non-Sulphate Shampoo. It is easy to find, it is written in bold (most times) just under the brand name. But what exactly is Non-Sulphate Shampoo and what are it's uses?

Let's take a look at what Sulphate does:
  1. Sulphate is mostly added to shampoo to 'clean' our hair from oils, hair products (such as hair gel, hair wax...)
  2. Sulphate is added to create a lather. You know the lather, the white foam, where as a child we would hold in our hands and blow and have a jolly good time.
Sodium Lauryl Sulphate (SLS)  is the harshes sulphate compound to find in a shampoo.

Simple to say, Sulphate is a cleansing agent that is use for all washing detergents (for dishes, clothes, floor). It is really good when u want something 'Squeaky Clean'. But not our hair especially when our hair is coloured. 

-N why not?

Naturally our hair produces oil to moisturize our scalp and hair shaft. By washing out these natural oil, we force production of our natural oil and causing our hair to be frizzy and dry. And when that happens, we slap on tons and tons of hair oil to salvage the damage we created.

For coloured hair, well u guess it, this is what stripped our hair colour out fast!

-So what should i do? 

Get a Non-Sulphate Shampoo.
There are a few places that carries good and trust worthy shampoos.
  1. Sephora
  2. Mustafa Center
  3. Guardian
  4. Watsons
Do Take Note: 
Some brands print in bold Non-Sulphate Shampoo but it still has the harsh sulphate in it.
What you want to do is turn the bottle around and read the ingredients, find those without these ingredients...
  • Sodium Lauryl Sulphate SLS
  • Sodium Laureth Sulphate SLES
  • Ammonia Laureth Sulfate ALS
  • TEA Laureth Sulphate TEA
  • Sodium Myneth Sulphate SMS
*these ingredients are place in order of super harsh to mild
   source from Sulphate free Shampoo 101

-ok i got the shampoo then what?

Wash your hair once a day or on alternate days. ( I personally wash my hair on alternate days)
You might feel your hair is not 'clean' because we are all condition to believe the 'lathering' feeling 'cleans' our hair. Dont worry your hair is clean and you may not be use to it in the beginning. Your hair might have an oily feel after wash. This is your natural hair oil and with it your hair is kept conditioned and you need not apply extra hair treatments.


Do give it a try. And i promise your coloured hair will last longer then a week.


Let Non-Suphate Shampoo be our bestfriend


Faith.Love Feline


Blogger Disclamer: This is not a sponsored post. All tips and info were expressed by my own views after experimenting on myself.


Wellness - Detox Water


Detox Water - Lemon Cucumber


You must have heard or seen images or read about Detox Water on Facebook or Instagram. A huge jar filled with vegetables, fruits filled with only water. 

I got myself hooked into the colourful water that promised to Detox.

Before i get started to how it benefits us, allow me to share with you why i started this journey....

For as long as i can remember i have a bad habit of not drinking water. And by water i mean clear plain water, which supposedly doctors say we have to drink 8 glasses per day. What i drank was bottle beverages or sodas.  Every morning i would fish for a bottle of milk tea or green tea. Till the day i watched Dr Oz show. 

In that particular episode, DrOz was explaining about losing weight and one of the factors was drinking sweet beverages. I vagely remember him saying no matter how much we exercise , if we do not drink WATER, our body cannot function well enough to accelerate weight loss. And of course the follow up would be diabetes and high blood pressure....

                                                           this image change my life
source from foodgirluk.com

The measurements of sugar in the picture is measured in teaspoon!!!!!
Vitamin Water (something i thought is good for when i exercise) has 8 teaspoon of sugar.
Check out Mountain Dew, 19.25 teaspoon. 
I dont even add sugar in my tea and the amount of sugar in these beverages is astoundingly high.

From that day on, I stop buying any sweet beverages and switch to drinking ONLY WATER.

AND then I chance upon Detox Water ...


Lemon and Cucumber Water

Benefits of Lemon:
  • Stimulate & regulate digestive track (Constipation etc.)
  • Boost immune system, Full of Vitamin C
  • Lowers blood pressure
  • Promotes weight loss

Benefits of Cucumber:
  • Full of Vitamin K, helps to heal injuries
  • Supplies Potassium, encourages proper function of cells, muscles , heart
  • Skin stays clear and SEXY!
source from livestrong.com

Both put together helps flatten belly, flush impurities out of your system.


Here's how to concoct the water:
  1. Thinly slice up 1 lemon & half of a cucumber
  2. Add into a jar of 1litre
  3. Fill it up with water
  4. Refrigerate overnight

My view on Lemon Cucumber Detox Water:
  • It has a refreshing taste, not sour or bitter
  • Best taken after meals, you will notice the water eliminates the food odour in your mouth almost instantly
  • If you are eating something fried, this water stops you from feeling you just drank a bottle of oil
  • Trips to toilet is very frequent, i think it's the work of flushing toxins out
In the 3 months i drank this, i lost 5kg (not bad for just drinking water huh). Dont get me wrong, i am not the kind of girl who wants to be super skinny. I love my curves. As long as im healthy, that's fine by me.
So do not think drinking this water alone could help you acheive your dream weight loss.


Do give it a try and share with me your views...


Let Lemon Cucumber Detox Water be your bestfriend


Faith.Love Feline


Blogger Disclaimer: This is not a sponsored post. All views expressed are on my own.


Nail Tutorial - Lace Stickers


Lace Stickers Nail Art

This the month of Easy Nail Art


Lace. Don't all Felines love lace. Soft flowy design trimming clothes, lingerie giving a sexy umph. 

Let's get our sexy on...


Things you need:
  1. Poshe Base coat
  2. Seche Vite Top coat
  3. China Glaze - Be more Pacific
  4. O.P.I - Jade is the New Black
  5. Nail Lace Stickers
  6. Cuticle pusher
  7. Cuticle Cutter


Here's how:

 Preparation - Prep nail with Basic Manicure
                            - Remove desired lace design sticker and cut into 1.5cm length

 Step 1 - Apply Base coat

 Step 2 - Apply O.P.I Jade is the New Black to all fingernails except Index finger

 Step 3 - Apply China Glaze Be more Pacific to Index Finger
                     *note: Apply one coat to all nails, and apply 2nd coat after.

 Step 4 - Apply Top coat to all nails
                      - Let it dry for about 10mins

 Step 5 - Pick up the cut up lace design sticker with a cuticle psuher and attached onto nails         
                    diagonally

 Step 6 - Use the Cuticle pusher to gently push the sticker onto nails
                  - Working from the center to sides of nail, pushing air out

 Step 7 - Cut out the unwanted stickers hanging at sides of nail with a Cuticle Cutter

 Finish - Finish with Top Coat and you are Done!


Where to get:

    1. D.Y.O.N International , *Scape Orchard, #02-25.
             - Nail Lace Sticker sells in a packet for $4


Hope you love having sexy lace on your nails cause I sure did!!

Let Lace be our bestfriend

Faith.Love Feline


Disclaimer:This was not a sponsored post. All views expressed are on my own


Nail Tutorial - French Manicure


French manicure Nail Art


This the month of Easy Nail Art!


French Manicure.. A Classic manicure with pink base and white tip. The perfect nail.
But today i'm exploring using a darker colour for the tip and natural base.
Let's get it on..


Things you need:
  1. Poshe Base coat
  2. Seche Vite Top coat
  3. China Glaze - Jungle Queen (you could use any colour)
  4. Nail tip guides sticker
  5. Cuticle pusher
  6. Cuticle cutter


Here's how:

 Preparation - Prep nails by basic manicure

 Step 1 - Apply Base Coat to clean buffered nails

 Step 2 - Remove a curve nail tip sticker from the package to your index finger
                  - Stick the middle of the sticker slightly below your nail line

 Step 3 - Using the rounded tip of Cutile pusher, gently secure the sides of the sticker down the
                    sides of your nail
         * note: ensure the sticker is firmly stuck onto your nails and no air in the sticker.

 Step 4 - Continue Step 2 & 3 with the remaining nails
         *note: finish the french manicure on one hand, let it dry before proceeding the other side

 Step 5 - Apply 2 coats of nail polish
         *note: Itis perfectly alright to paint onto the sticker, DO NOT paint beyond the sticker.

 Step 6 - Using the Cuticle cutter, gently remove the sticker, start from the sides

 Finish - Top Coat and you are done.
                  - Let it dry and proceed same steps for other hand


Where to get:

    1. D.Y.O.N International , *Scape Orchard, #02-25.
             - Nail Tip Sticker sells in a packet for $1

There you have a perfect French Manicure... of course traditional French Manicure is white tipped but we can be adventurous and creative..


Let French Manicure be our bestfriend

Faith.Love Feline


Disclaimer: This is not a sponsored post. All views expressed are on my own.


Nail Tutorial - Diamond


Diamond Nail Art

This the month of Easy Nail Art


Diamonds are girls Best Friend! So why not have them on our nails.

Let's go...


Things you need:
  1. Poshe base coat
  2. Seche Vite Top coat
  3. O.P.I Jade is the New Black
  4. Dotting tool
  5. Diamond studs
  6. Vaseline


Here's how:

 Preparation - Clean nails, Basic Manicure
                            - Pour 8 diamond studs onto work table, flipping the studs so the diamonds are 
                              facing you

 Step 1 - Apply Base Coat

 Step 2 - Apply two layers of O.P.I Jade is the New Black onto all nails
                  - Apply Top coat 

 Step 3 - Dip Dotting tool into vaseline, pick up a diamond stud
                  - Place diamond stud onto base of nail

 Finish - Apply Top Coat and DONE!


Where to get:

    1. D.Y.O.N International , *Scape Orchard, #02-25.
             - Nail Diamond Stud sells in a packet for $4

Have Fun Jazzing up your nails

Let Diamonds be our best friend

Faith.Love Feline


Disclaimer: This is not a sponsored post. All views expressed are on my own